5 best ways to recover deleted and lost data from Google Pixel phone, no matter with or without backup.
This is an useful article telling how to efficiently recover deleted and lost data from Google Pixel smartphone, and also describes how to back up data on Google Pixel smartphone easily.
Pixel is the Pixel series mobile phone officially launched by Google on October 5, 2016. It has been released to Google Pixel 5 now. The biggest feature of this series is a mobile phone equipped with "Google Assistant" and will be deeply integrated with cloud computing. In addition, there is free cloud space for storing users' photos and videos. Google provides consumers with unlimited online pictures and video resources. Next, I will introduce you how to recover lost or deleted data regardless of whether you have backed up or not.
Part 1 Solution for Google Pixel Data Recovery
- Method 1 Restore Data from Google Drive to Google Pixel Smartphone
- Method 2 Recover Data from Google Pixel Smartphone without Backup (Recommended)
- Method 3 Restore Data from Backup to Google Pixel Smartphone
- Method 4 Restore Backup to Google Pixel Smartphone via Mobile Transfer
- Method 5 Restore Data from Previous Phone to Google Pixel Smartphone
Part 2 Solution for Google Pixel Data Backup
- Method 1 Back Up Google Pixel Smartphone Data to Google Drive
- Method 2 Back Up Data from Google Pixel Smartphone to Computer
- Method 3 Export Data from Google Pixel Smartphone to PC
Part 1 Solution for Google Pixel Data Recovery
Method 1 Restore Data from Google Drive to Google Pixel Smartphone
Step 1: Open Google Pixel Smartphone and enter the main interface. Then swipe up the bottom menu and select "Settings".
Step 2: After entering "Settings", scroll to find and click "Accounts", then select your Google account.
Step 3: After entering the Google account, click "Account sync".
Step 4: Click the menu button on this page, and click the type of data you need to synchronize. Then click "Sync now". Now the data of your Google account will be synchronized to your Google Pixel smartphone.
Method 2 Recover Data from Google Pixel Smartphone without Backup
Android Data Recovery can help you recover deleted and lost data faster, more efficiently, and more safely, such as contacts, text messages, call logs, WhatsApp messages, audio, videos, photos, pictures, documents, etc. All in all, as long as the data on your phone have not been overwritten, it can be restored. Is there any other shining point of such an excellent recovery software? First, its operation steps are very simple, and whether you delete data accidentally or the phone automatically loses data, whether the phone can be used normally, it can quickly restore lost and deleted data. In addition, it has high compatibility and is suitable for Android mobile phone brands such as Google, Honor, Samsung, Huawei, Google, Xiaomi, OPPO, vivo, HTC, LG, Sony, Motorola, etc. Most importantly, it is very safe. It neither leaks your information nor damages your data. Its function is not only to restore data, it can also back up data.
Supported Google Device: Google Pixel 5/5XL/5A, Google Pixel 4/4XL/4A, Google Pixel 3/3XL/3A/3A XL, Google Pixel 2/2XL, Google Pixel, Google Pixel XL, Google Pixel C, and so on.
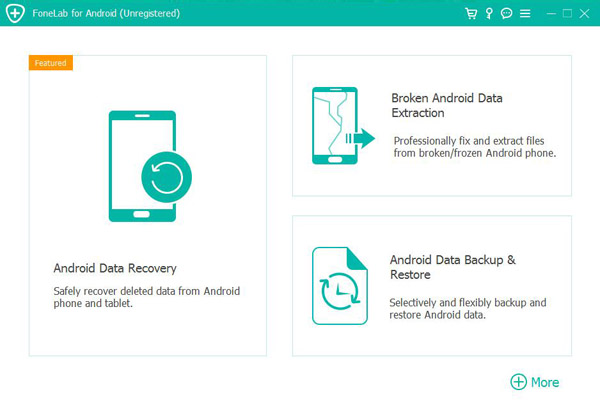
Step 1: Firstly, download, install and run the program on your computer. After entering the program, please check the "Android Data Recovery" mode on the main interface.
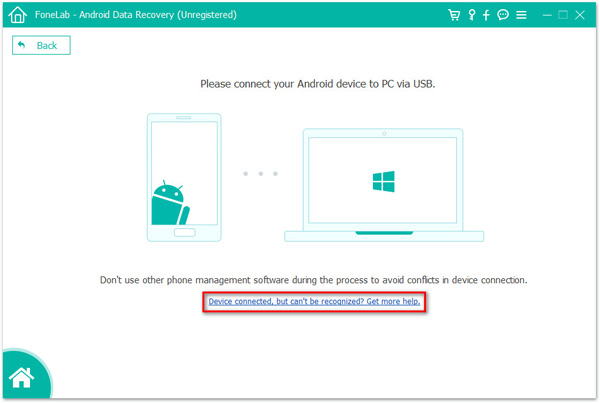
Then connect the Google Pixel smartphone to your computer with a USB cable. Immediately afterwards, the connection progress bar appeared on the main interface, and your device will be detected soon. If your device can not be recognized, please follow the prompts displayed on the software to get more help.
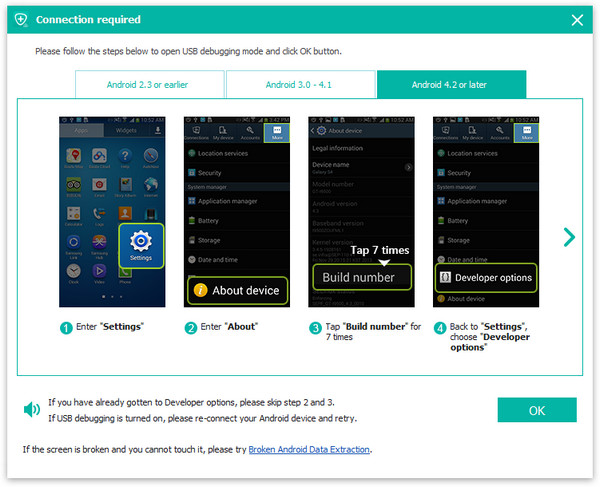
Step 2: After fully entering the program, it will automatically detect your Android version. You need to turn on the USB debugging of Google Pixel Smartphone according to the steps provided by the program, and then click "OK".
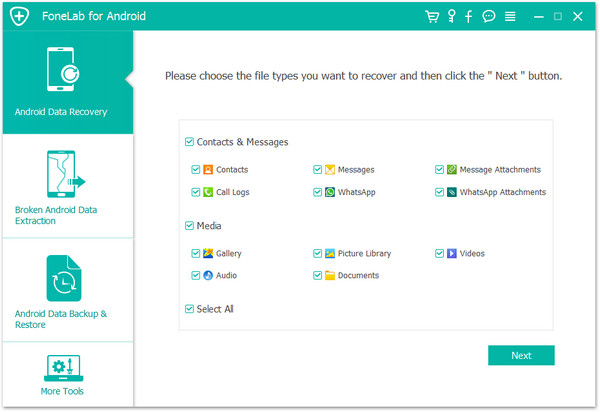
Step 3: When the connection have been established, the main interface will show a list of recoverable data, please check the types of data you need to recover, and click "Next" after confirmation. Then the program will scan your phone for the selected contents.
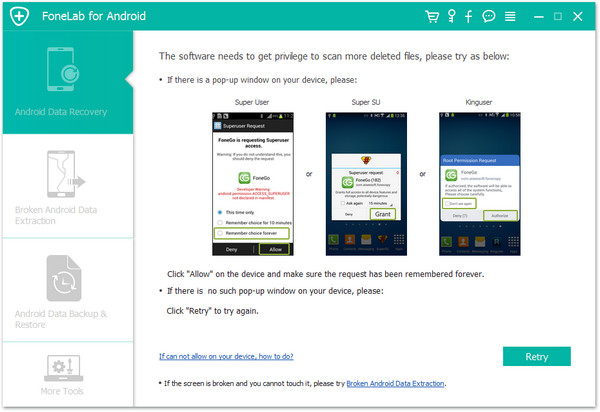
Note: Here, the program needs permission to scan for deleted and lost data. If your device pops up a window, remember to click on the "Allow" button to make sure the request is remembered. If your device does not pop up such a window, please click "Retry" to try again.
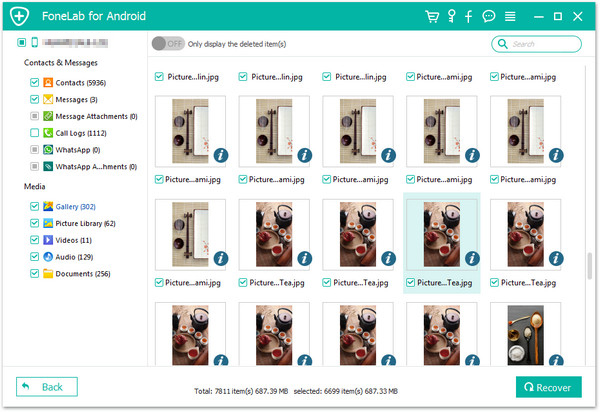
Step 4: After the scan is successful, the main interface displays the type of data that can be recovered. Wait for you to preview and confirm the data type, and then click "Recover". All data that needs to be recovered will be saved on your computer. Please be patient, the length of time required for recovery is directly proportional to the amount of recovered data.
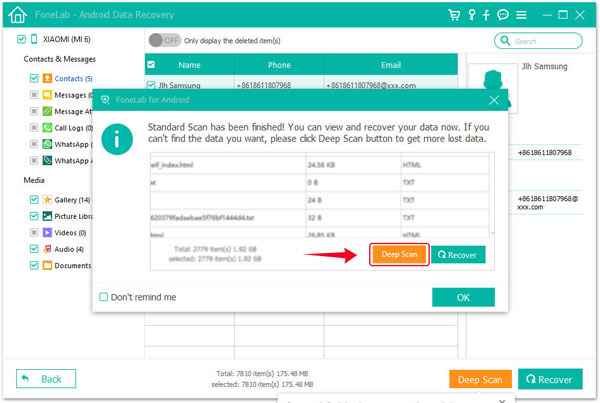
Tips: In order to save scanning time, the program will perform standard scanning by default. If you cannot find the data you need after scanning, please calm down and you only need to click Deep Scan to scan your phone again.
Method 3 Restore Data from Backup to Google Pixel Smartphone
If you have ever used Android Data Recovery to back up your phone data, or get an available backup data that supported by the software, then the recovery process is faster and easier to operate than the previous one, you just need to extract the selected backup and restore data to your Google Pixel smartphone selectively.
Step 1: Run the program on your computer, and then click "Android Data Backup & Restore".

Step 2: Connect the Google Pixel smartphone to the computer using a USB cable.
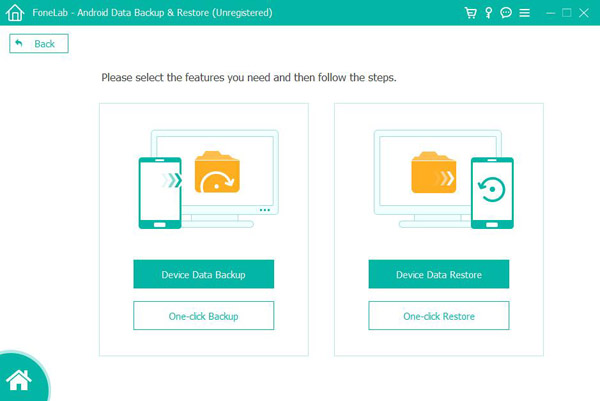
Step 3: Now, the "Device Data Restore" and "One-click Restore" options appear on the main interface, you can choose either one, and both can be used to restore the backup file.
Step 4: Now, please select the backup you need from the backup list, and then click "Start" to begin restoring the selected backup to your Google Pixel smartphone.
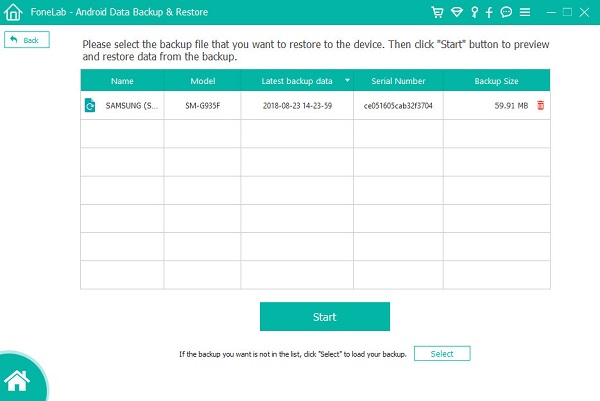
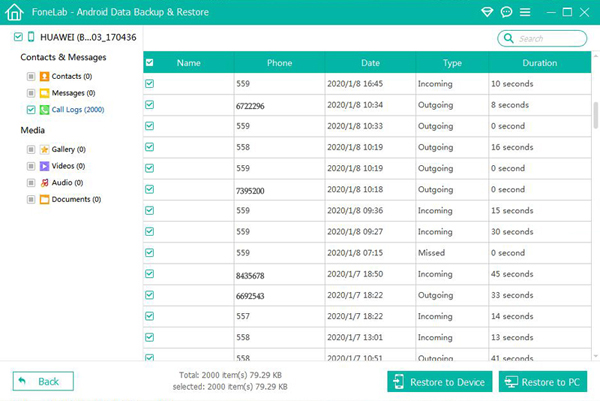
If you choose the "Device Data Restore" option, after clicking "Start", the program will extract all the recoverable files from the selected backup, please select those what you need and click on "Restore to Device" to save them back to your Google Pixel smartphone.
Method 4 Restore Backup to Google Pixel Smartphone via Mobile Transfer
Mobile Transfer is an excellent data transfer software, but it can also restore and backup data. First, its operation is very simple and fast. Secondly, its compatibility is very good, not only compatible with Google, Huawei, Honor, Xiaomi, vivo, OPPO, Google, LG, ZTE and other Android phones, but also compatible with all versions of iPhone. Third, it can transfer multiple types of data, including contacts, text messages, photos, videos, audio, music, call logs, applications, etc. Last but not least, it has a high safety factor, and will neither leak your information nor cause any harm to your mobile phone during data transmission. If you have ever used this software to backed up your phone data, then you can use the following method.
Step 1: Download, install and run Mobile Transfer on your computer, then click "Restore from Backups" mode, and select "MobileTrans" among all items.
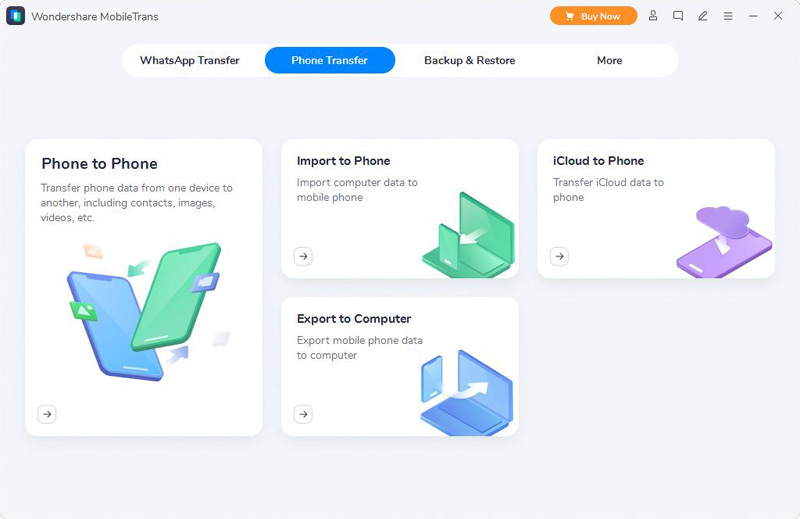
Note: The reason for choosing "MobileTrans" is because you have backed up the data in Google Pixel Smartphone using Mobile Transfer software. Needless to say, the program will also support other backup files, such as Kies backup, iCloud backup, iTunes backup, OneDrive backup, BlackBerry backup, etc. If you have any type of backup file, you can also select it.
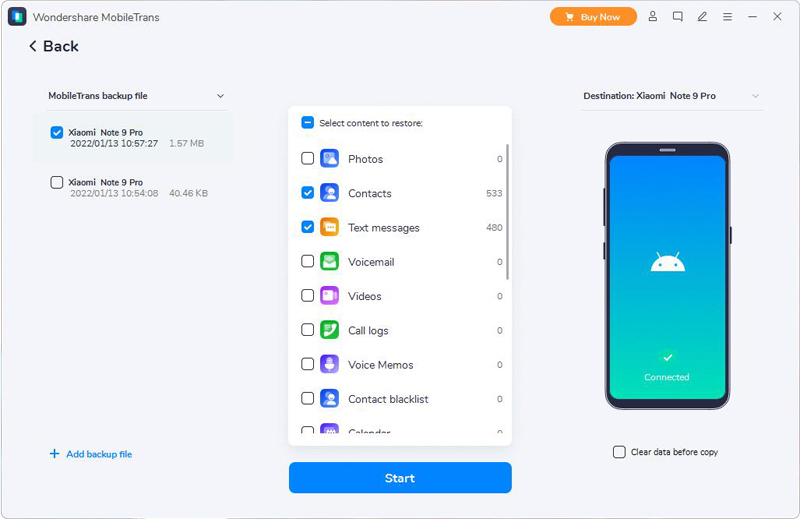
Step 2: Choose a backup file you need, and then use a USB cable to connect your Google Pixel smartphone to the computer.

Step 3: After the computer detects your device, select the file type as needed, and then click "Start Transfer" to sync to your Google Pixel smartphone. At this point, you can see the transfer progress bar on the interface, please be patient.
Method 5 Restore Data from Previous Phone to Google Pixel Smartphone
Sometimes, it is impossible for everything to go smoothly. If you don't have a backup file, and the above methods are unable to restore the lost data, then you have to find another way. It is also a good idea to check whether the required data is still retained in the previous phone. If there are, then you can transfer them to your Google Pixel phone. And here there are two simple ways to help syncing data from phone to phone.
Part 1 Restore Data from Previous Phone to Google Pixel Smartphone with Mobile Transfer
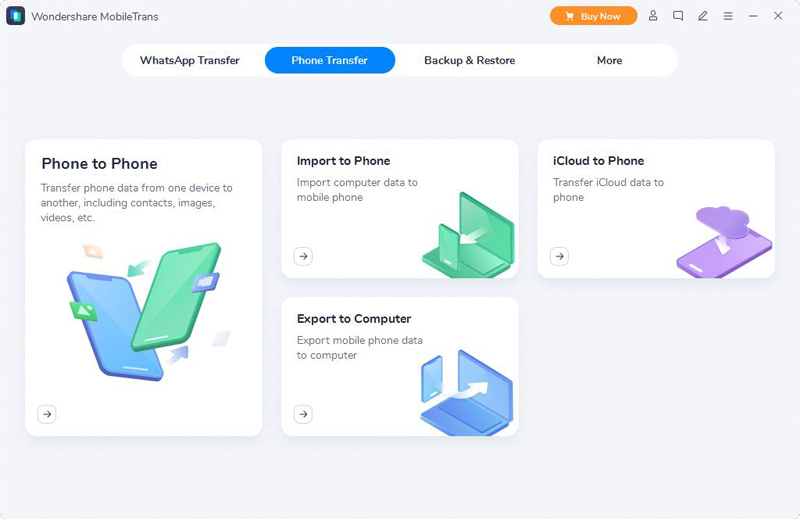
Step 1. Return to the homepage of Mobile Transfer, then choose "Phone to Phone Transfer" and tap "Start".
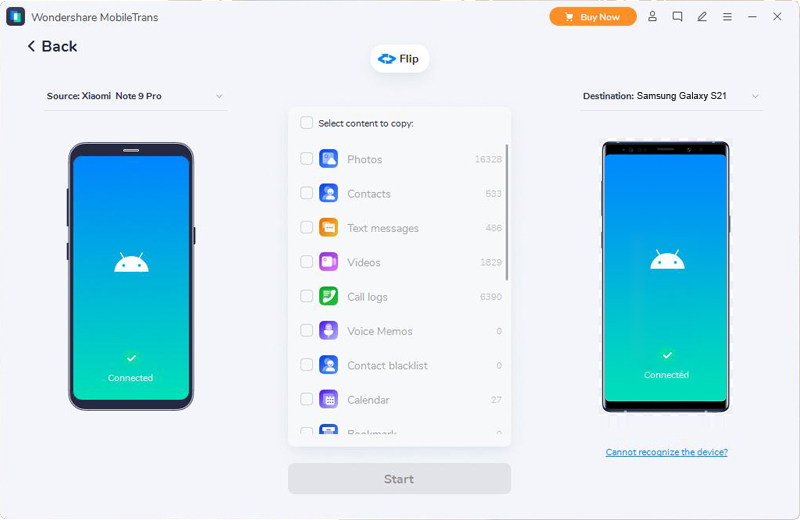
Step 2. Connect both of your previous phone and Google Pixel phone to computer.
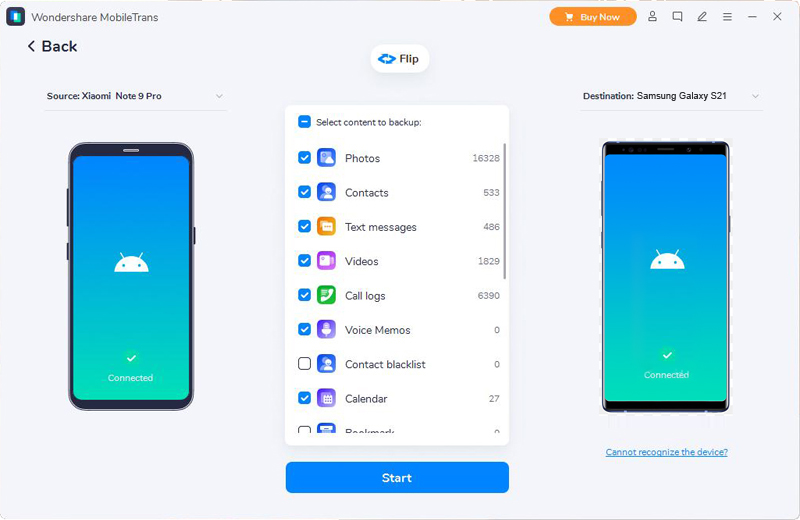
Step 3. Select the file types that you want to transfer, tap on "Start Transfer" to sync them from the previous phone to your Google Pixel phone.
Part 2. Sync Previous Phone Data to Google Pixel Directly
1. Factory reset your Google Pixel phone, then tap "Start".
2. Connect your Google Pixel phone to a Wi-Fi netword and tap "Copy your data".
3. Turn on your previous phone, then plug one end of a cable into your previous phone, and plug the cable's other end into your Google Pixel phone. Or plug it into the Quick Switch Adapter and plug the adapter into your Google Pixel phone.
4. Tap on "Copy" on your previous phone, and follow the prompts displayed on its screen to go on.
5. Now, you'll see a list of the transferable data, select whose what you need, then tap on "Copy".
6. Wait for the transfer to complete.
Part 2 Solution for Google Pixel Data Backup
Method 1 Back Up Google Pixel Smartphone Data to Google Drive
1. Open Google Pixel Smartphone and enter the main interface. Then swipe up the bottom menu, then scroll and select "Settings".
2. After entering "Settings", scroll to find and click "System", then select"Backup".
3. After entering "Backup", click the "Back up to Google Drive" button in the upper left corner.
4. Click "Account", a new page will pop up on the interface, please select your backup account, and then click "OK".
5. Now please return to the "Settings" page,click "Accounts", and then select your Google account.
6. After entering the Google account, click "Account sync".
7. Click the menu button on this page, and click the type of data you need to synchronize. Then click "Sync now". Now your Google Pixel Smartphone data will be synced to your Google account.
Method 2 Back Up Data from Google Pixel Smartphone to Computer
Step 1: Run the Android Data Recovery software, and then select "Android Data Backup & Restore" in the main interface.

Step 2: Connect the Google Pixel smartphone to the computer via its USB cable.
Step 3: After successfully connecting with your Google Pixel smartphone, you can choose the "Device Data Backup" or "One-click Backup" option to back up files.

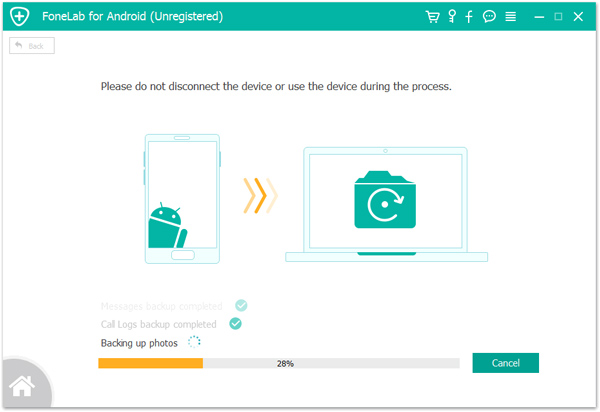
Step 4: Finally, now you can click "Start" to export data from Google Pixel smartphone to your computer.
Method 3 Export Data from Google Pixel Smartphone to PC with Mobile Transfer
Step 1: Run Mobile Transfer and select the "Back Up Your Phone" mode on the main interface.

Step 2: Connect the Google Pixel smartphone to the computer via USB. After the software recognizes the device, your Google Pixel smartphone will appear on the left panel, and all transferable files on the device will be displayed on the middle panel.
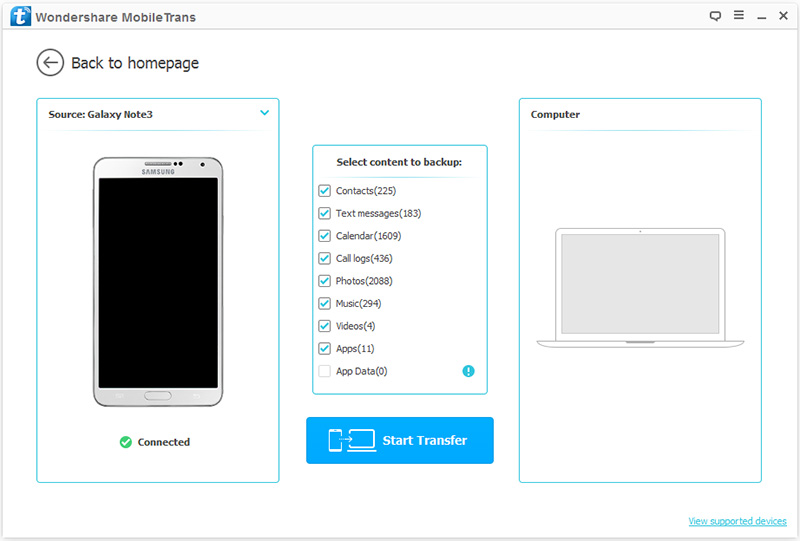
Step 3: Select the desired file and click "Start Transfer" to synchronize it to the computer.
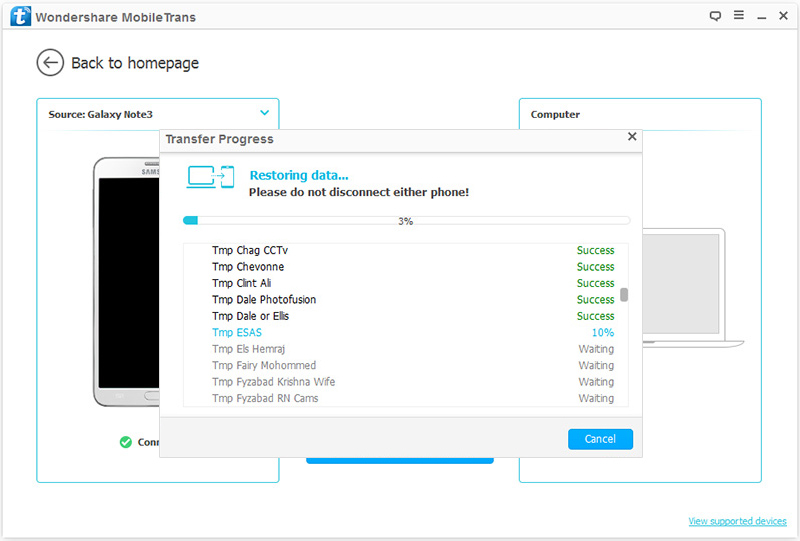
Note: After the backup is over, you can click the pop-up window or go to the settings to find the backup file, or you can change the path of the backup file here.


