7 simple ways to recover deleted and lost data from Samsung Galaxy A series phone, whether you have a backup or not.
After losing data in Samsung, you feel that you are very upset? Don't worry, when you finish reading this article, you will no longer have to worry about data loss. Because in this article, I will introduce you a variety of efficient and convenient methods to help you recover lost or deleted data in Samsung Galaxy A Series. Please read carefully!
Samsung Galaxy A Series is a stylish mobile phone series created by Samsung for young people. The Galaxy A series, which focuses on the young market, allows users to enjoy social life more freely. At present, Galaxy A Series has released a variety of models, such as the Galaxy A7, Galaxy A5, and Galaxy A3 phones launched in 2017, and the four phones of Galaxy A40s, Galaxy A60, and Galaxy A70 launched on April 17, 2019. The Galaxy A90, Galaxy A70s, Galaxy A50s, Galaxy A20s and other mobile phones launched at the end of 2019. Galaxy A Series brings a shocking visual feast to users with a clear and excellent screen. It satisfies users' daily demand for electricity with strong battery life. It uses a powerful camera to help you record every wonderful moment. Not only that, the processor used in the Galaxy A Series can give users a different experience. All in all, Samsung Galaxy A Series is very in line with the aesthetics of contemporary young people in terms of appearance and configuration. Therefore, it is also loved by young consumers.

There is no doubt that the Samsung Galaxy A Series equipment is quite good. Whether it is configuration or other aspects, it is very satisfying to users. But we know that no matter how excellent the device is, the data in the device will always be lost for some reason during our use. When our data is lost, we always feel distressed, because these data may be very important to us. If you are also a member of the lost data, then read this article! This article will introduce you a variety of efficient and convenient methods to recover lost or deleted data in Samsung Galaxy A Series. You will be able to get the method that suits you best in this article.
Part 1 Methods for Data Recovery
- Method 1. Directly Recover Data on Samsung Galaxy A Series without Backup
- Method 2. Restore Data from Backup to Samsung Galaxy A Series
- Method 3. Extract Data from Broken/Damaged Samsung Galaxy A Series
- Method 4. Restore Backup to Samsung Galaxy A Series using Samsung Kies
- Method 5. Restore Backup to Samsung Galaxy A Series using Samsung Cloud
- Method 6. Restore Backup to Samsung Galaxy A Series using Google Cloud
- Method 7. Restore Backup to Samsung Galaxy A Series using Mobile Transfer
Part 2 Methods for Data Backup
- Way 1. Backup Data from Samsung Galaxy A Series to Computer
- Way 2. Backup Data from Samsung Galaxy A Series to Samsung Cloud
- Way 3. Backup Data from Samsung Galaxy A Series with Samsung Kies
- Way 4. Backup Data from Samsung Galaxy A Series with Mobile Transfer
Method 1. Directly Recover Data on Samsung Galaxy A Series without Backup
Without backup, you can also directly restore lost or deleted data in Samsung Galaxy A Series. But you need the help of Samsung Data Recovery to use this method. Samsung Data Recovery is a powerful data recovery software. Even if you don't back up the data you need, with its help, you can retrieve the data you need and restore it to your Samsung device. Of course, the types of data that Samsung Data Recovery can recover are very rich. Whether it is contacts, call records, photos, videos, audios, text messages, WhatsApp chat records, etc., it can be easily restored. In addition, its compatibility is also very good. It is compatible with more than 7000 models of devices including Samsung Galaxy A Series. It is worth mentioning that the software also has a trial version. You can decide whether to buy this software after experiencing the trial version.


- Supported Samsung Galaxy A Series Device: Samsung Galaxy A91/A90/A9 Pro/A9, Samsung Galaxy A8/A8s/A8+/A8 Dous/A8 Star/A80, Samsung Galaxy A7/A7 Dous/A70/A70s/A71/A72, Samsung Galaxy A6/A6+/A6s/A60, Samsung Galaxy A5/A50/A50s/A51/A52, Samsung Galaxy A42/A41/A40, Samsung Galaxy A3/A30/A30s/A31/A32, Samsung Galaxy A21/A21s, Samsung Galaxy A20/A20e/A20s, Samsung Galaxy A11, Samsung Galaxy A10e/A10/A10s, Samsung Galaxy A01/A01 Core, etc.
- Supported Situation: Improper Handling, Accidental Deletion, OS/Rooting Error, Device Failure/Stuck, Virus Attack, System Crash, Forgotten Password, SD Card Issue, Factory Settings Restore, etc.
Step 1: Download and install Samsung Data Recovery
According to the computer system, select the appropriate Samsung Data Recovery to download to your PC. Then follow its prompts to complete the installation and start it.
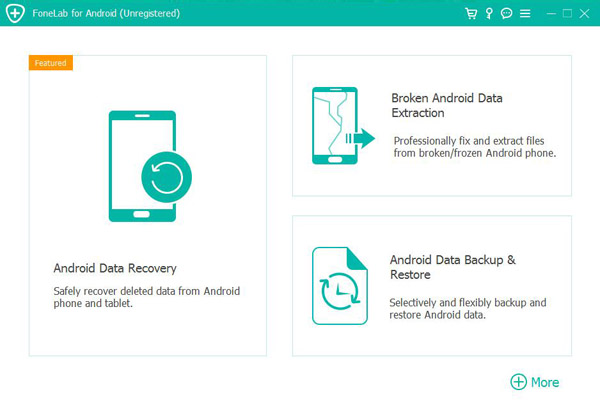
Step 2: Choose a recovery mode
After successfully entering the homepage of the software, select "Android Data Recovery" mode.
Step 3: Connect the device to the computer
Use USB cable to connect your device (Samsung Galaxy A Series) to the computer. Then enable USB debugging on the device.
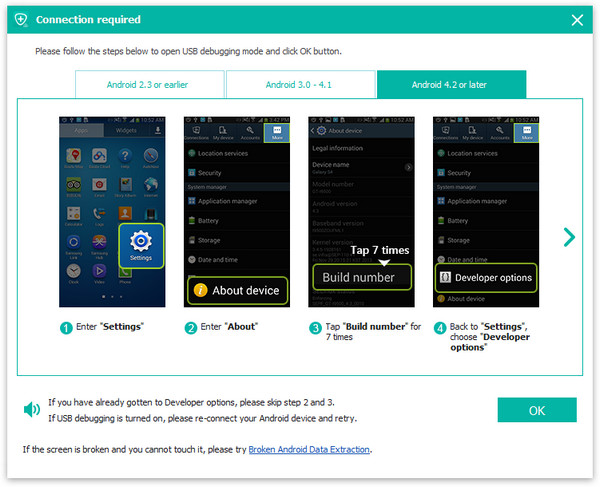
Tips: If you don't know how to enable USB debugging on your device, Samsung Data Recovery will provide you with the corresponding steps according to your device model and system.
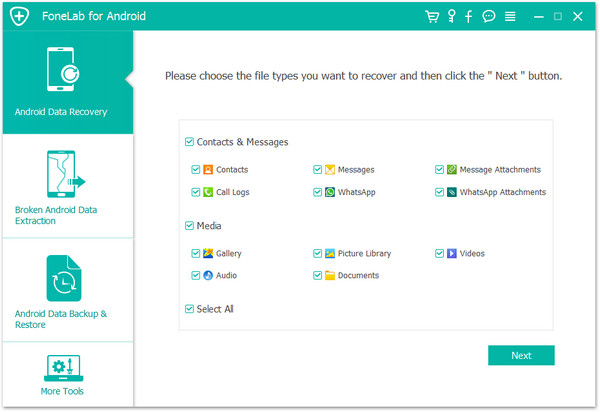
Step 4: Scan the data to be recovered
When the software successfully detects your device, you can see all file types on the page. Select the file type you need to recover, and then click "Next" to scan.
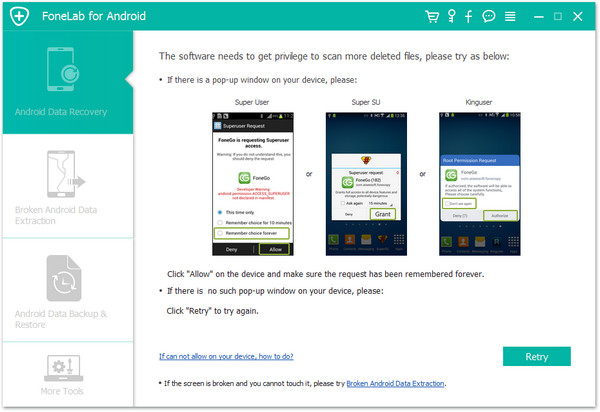
Tips: In the scanning process, in order to break through some restrictions, this program will need the authorization to scan more deleted data. Please allow the related request.
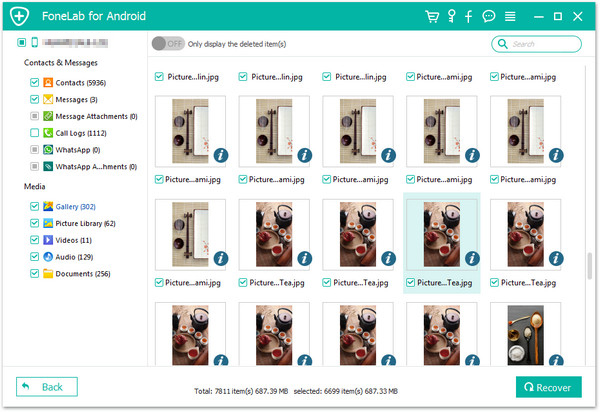
Step 5: Preview and recover data selectively
After the scan is completed, all scanned data specific items will appear on the page. You can preview and select the data to be restored to Samsung on the page. After selecting, click "Recover" to perform data recovery.
Method 2. Restore Data from Backup to Samsung Galaxy A Series
If you have a backup, you can also use Samsung Data Recovery to help you restore lost or deleted data to your device.
Step 1: Launch Samsung Data Recovery and select "Android Data Backup & Restore" mode on the homepage.
Step 2: Connect the Samsung Galaxy A Series to the computer with a USB cable.
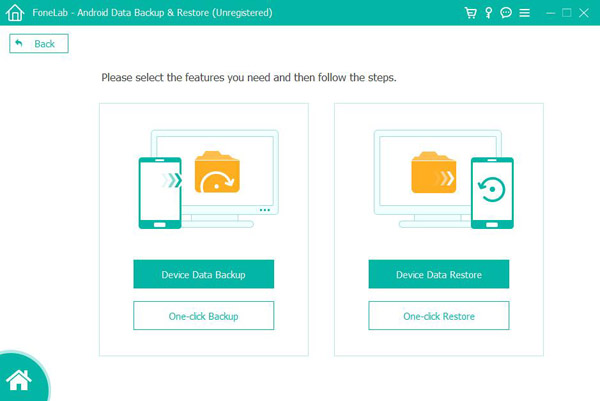
Step 3: After your device is successfully detected, please select "Device Data Restore" or "One-click Restore" mode on the page.
Step 4: Now, the software will display all your backup files on the page. Select the backup file you need to restore, and then click "Start" to extract all the contents that can be restored from the selected backup.
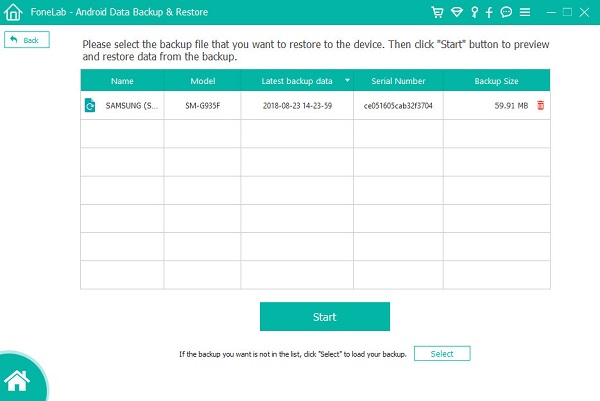
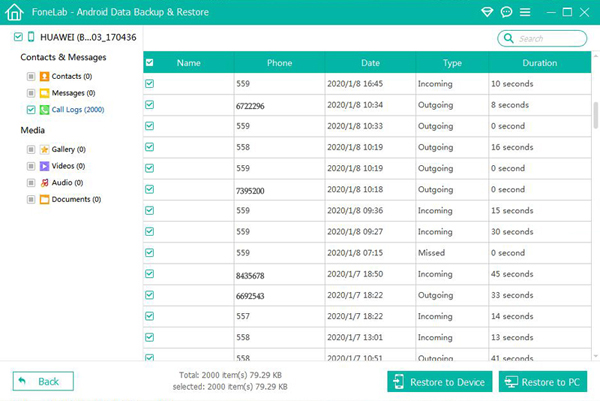
After that, select the files you need, and press "Restore to Device" or "Restore to PC" to restore the selected data back.
Method 3. Extract Data from Broken/Damaged Samsung Galaxy A Series
In addition to directly recover data and restore data from backup, Samsung Data Recovery also allows users to fix the your Samsung phone to normal no matter what situation your phone get stuck in, and extracting to restore data from a damaged/broken Samsung Galaxy device. Without further ado, let's see how it works.
Step 1. Tap on "Broken Android Data Extraction" after running the software, then connect your Samsung Galaxy A series phone to computer via a USB cable, the program will automatically detects your device.
Step 2. Once your phone is recognized, select the reason why your device get stuck in, and then tap on the corresponding “Start” button.

Step 3. Select the name and model of your Samsung device, then check the box near “I agree with the claimer” option and tap on “Confirm”.

Step 4. Follow the guide to enter the download mode on your phone, then tap “Start” to begin fixing your phone return to normal.

Step 5. After your phone reture to normal, all the recoverable files on your phone will be displayed, select those what you want to recover, then tap on "Restore" to save them back.

Method 4. Restore Backup to Samsung Galaxy A Series using Samsung Kies
Step 1. Run Samsung Kies on your computer and connect your Samsung Galaxy A series to computer using USB cable.
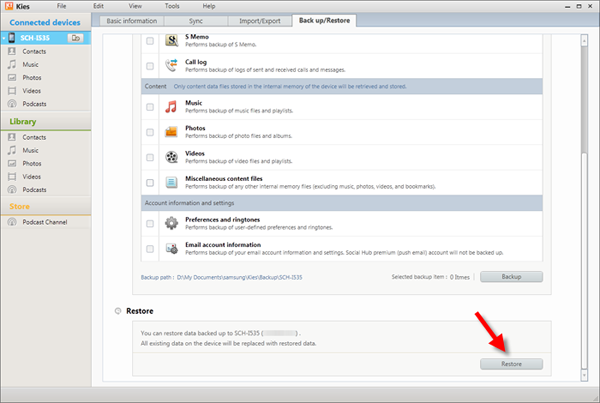
Step 2. Tap on "Back up/Restore" in the top menu bar to load the corresponding page, then scroll to the bottom of the window and press "Restore".
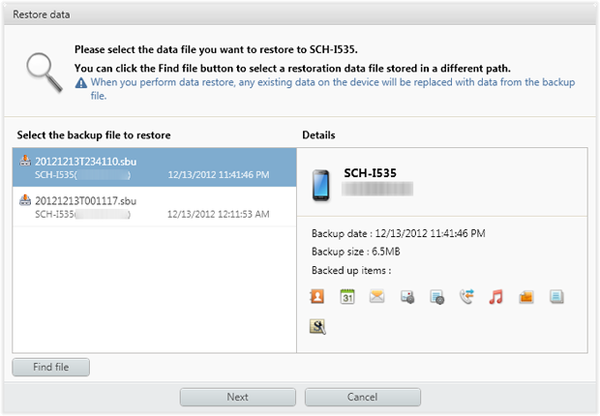
Step 3. Choose a backup file from the list as you like and press "Next".
Step 4. Select the data type(s) displayed on the interface and click on "Next". Please make sure you want to restore the backup to your device. This is your last chance to back out of the restore.

Step 5. Now, the program will automatically restore the selected data to your device, when the restore completes, you'll see a confirmation dialog box, and your device will reboot.
Method 5. Restore Backup to Samsung Galaxy A Series using Samsung Cloud
If your lost data have ever backed up to Samsung Cloud, you can use this method to complete data recovery.
Step 1: Connect Samsung Galaxy A Series to a stable Wi-Fi network.
Step 2: Enter "Settings" in the device, tap “Accounts and backup”, and then tap “Backup and restore”.
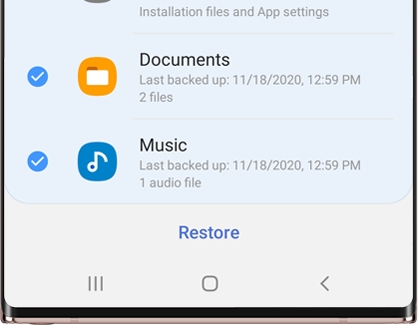
Step 3: Now please press "Restore data", then select the device you need, and select the data you need to restore to Samsung Galaxy A Series. After selecting, click "Restore" to restore the required data to the device.
Tips: It takes a certain time to restore the data, please be patient!
Method 6. Restore Backup to Samsung Galaxy A Series using Google Cloud
If the data you need is backed up in Google Cloud, you can choose the following method.
Step 1: Connect your device to a stable Wi-Fi network.
Step 2: Open Setting, find Accounts, and then press Add Account. Here, you need to add and log in to your Google account.
Step 3: Now, you can choose the data that needs to be restored from the backup to the Samsung Galaxy A Series. After selecting, click "RESTORE" to restore the backup data of Google Cloud to your device.
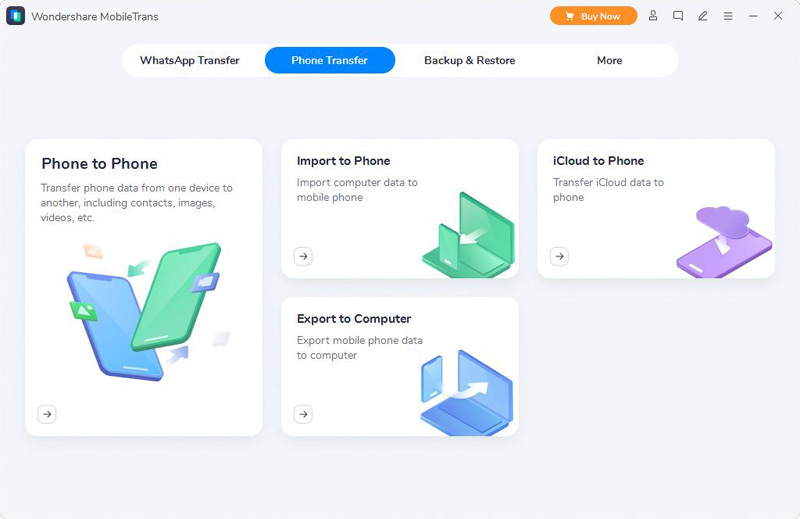
Method 7. Restore Backup to Samsung Galaxy A Series using Mobile Transfer
If you have ever backed up data from your device with Mobile Transfer, you can use this method. The advantage of this method is that its operation is very simple and convenient, and very safe.
Step 1: Download, install and run Mobile Transfer on the computer, then select "Restore From Backups" mode on the main page and clcik "MobileTrans" or "Kies" according to backup file types saved on your computer.
Step 2: Select a backup from the list and connect the Samsung Galaxy A series phone to the computer with a USB cable.
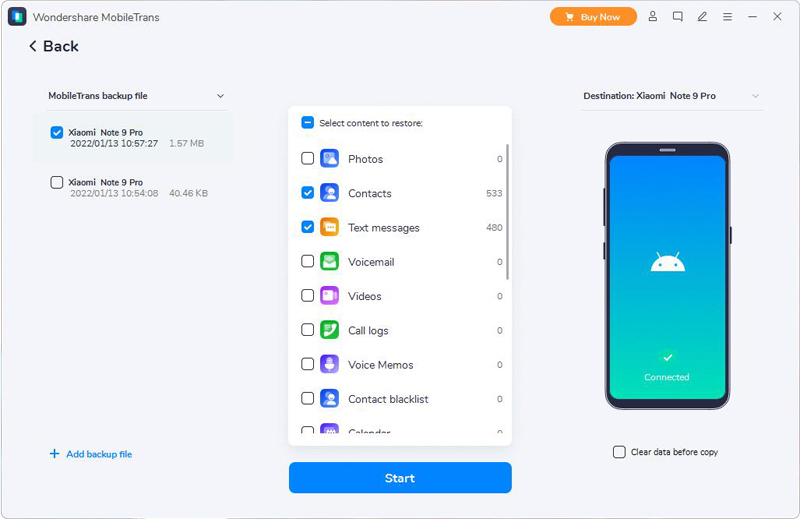
Step 3: Once your device is detected, select the data you want to recover. After confirming that it is correct, click "Start Transfer" to restore the data from backup to the Samsung Galaxy A series phone.

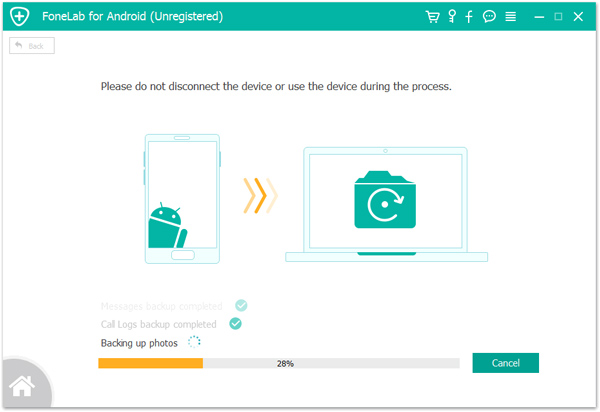
Way 1. Backup Data from Samsung Galaxy A Series to Computer
Only by regularly backing up your data, you don't have to worry about data loss. Below I will introduce you a safe and efficient method to backup data in Samsung Galaxy A series phone.
Step 1: Run Samsung Data Recovery, and then select "Android Data Backup & Restore" mode on the main page.
Step 2: Use a USB cable to connect your Samsung Galaxy A Series phone to the computer.
Step 3: Select "Device Data Backup" or "One-click Backup" option on the page.
Step 4: Now, you can select the data you need to back up on the page. After selecting, you can change the save path of your backup file. Finally, click "Start" to back up your data to your computer.
Way 2. Backup Data from Samsung Galaxy A Series to Samsung Cloud
Make sure that you've logined the Samsung account on your phone. Now, you can back up your Samsung data according to the following steps,
Step 1: Connect your device to a stable Wi-Fi network.
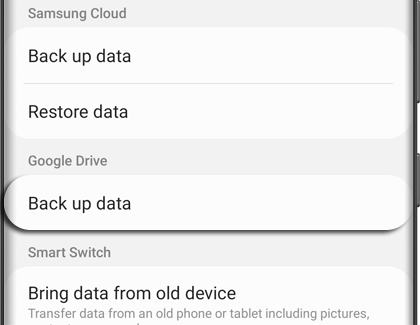
Step 2: Open "Setting", press your "name", and then press "Back up data". When you are backing up data for the first time, you need to press "No backups".
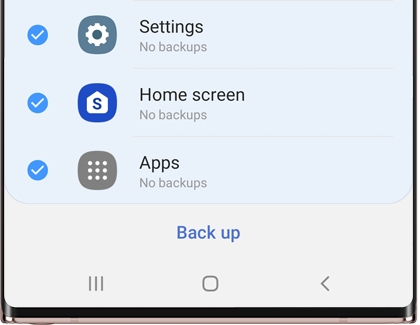
Step 3: Press "Back up data" again, and then select the data you need to back up on the page. After choosing. Press "Back up" to start backing up your data to Samsung Cloud. After completing the data backup, press "Done" to exit the backup.
Way 3. Backup Data from Samsung Galaxy A Series with Samsung Kies
Samsung Kies is specially developed by Samsung for data synchronization and software management, so it is also a good choice to back up your phone data.
Step 1: Run Samsung Kies and connect your Samsung Galaxy A series phone to computer using its USB cable.
Step 2: Wait for your phone is recognized, click on "Back up/Restore" in the top menu bar.

Step 3: Select the files that you want to back up, then scroll to the bottom of the window and tap on "Backup" button.

Step 4: Once the backup is complete, click on "Complete". The time required for the backup is depond on the amount of your selected data. Please maintain a stable connection between your phone and the network until you are told that the backup is finish.
Way 4. Backup Data from Samsung Galaxy A Series with Mobile Transfer
Mobile Transfer is also the master of data backup, it allows you one click to back up all data including contacts, text messages, photos, videos, call logs, music, calendar, Apps, App data and more from your Samsung Galaxy A series phone to computer.
Step 1: Run Mobile Transfer and tap on "Back Up Your Phone".

Step 2: Use a USB cable to connect your phone to computer.

Step 3: Select the files that you want to back up, then tap on "Start Transfer" to save them to your computer for the specified path.


